
Spring Boot 添加MySQL数据库及JPA实例

最近在学习Spring Boot,继续前面的学习,这一次我们加入MySQL数据库和JPA。
配置:
pom.xml文件
<!-- 添加Mysql和JPA-->
  <dependency>
  <groupId>org.springframework.boot</groupId>
  <artifactId>spring-boot-starter-data-jpa</artifactId>
  </dependency>
  <dependency>
   <groupId>mysql</groupId>
   <artifactId>mysql-connector-java</artifactId>
  </dependency>
在Application.properties(在resource文件夹下新建,进行配置)文件中添加数据进行配置:
spring.datasource.url = jdbc:mysql://localhost:3306/spring_boot
spring.datasource.username = root
spring.datasource.password = root
spring.datasource.driverClassName = com.mysql.jdbc.Driver


# Specify the DBMS
spring.jpa.database = MYSQL
# Show or not log for each sql query
spring.jpa.show-sql = true
# Hibernate ddl auto (create, create-drop, update)
spring.jpa.hibernate.ddl-auto = update
# Naming strategy
spring.jpa.hibernate.naming-strategy = org.hibernate.cfg.ImprovedNamingStrategy

# stripped before adding them to the entity manager)
spring.jpa.properties.hibernate.dialect = org.hibernate.dialect.MySQL5Dialect
User类
package com.seawater.bean;

import javax.persistence.*;
import javax.validation.constraints.NotNull;

/**
 * Created by zhouhs on 2016/12/30.
 */
@Entity
@Table(name = "user")
public class User {

 @Id
 @GeneratedValue(strategy = GenerationType.AUTO)
 private Long id;
 private String name;
 private int age;

 public Long getId() {
  return id;
 }

 public void setId(Long id) {
  this.id = id;
 }

 public String getName() {
  return name;
 }

 public void setName(String name) {
  this.name = name;
 }

 public int getAge() {
  return age;
 }

 public void setAge(int age) {
  this.age = age;
 }
}
UserController
package com.seawater.controller;
import com.seawater.Dao.UserDao;
import com.seawater.bean.User;
import io.swagger.annotations.Api;
import io.swagger.annotations.ApiImplicitParam;
import io.swagger.annotations.ApiImplicitParams;
import io.swagger.annotations.ApiOperation;
import org.springframework.web.bind.annotation.RequestMapping;
import org.springframework.web.bind.annotation.RequestMethod;
import org.springframework.web.bind.annotation.RequestParam;
import org.springframework.web.bind.annotation.RestController;

import javax.annotation.Resource;

/**
 * Created by zhouhs on 2016/12/30.
 */
@RestController
@RequestMapping(value = "/user")
@Api(description = "用户")
public class UserController {

 @Resource
 UserDao userDAO;
 @ApiOperation(value = "添加用户")
 @ApiImplicitParams({
   @ApiImplicitParam(name = "name" , value = "name" , paramType = "query" , required = true ),
   @ApiImplicitParam(name = "age" , value = "age" , paramType = "query" , required = true )
 })
 @RequestMapping(value = "/addUser" , method = RequestMethod.POST)
 public String addUser(@RequestParam(value = "name") String name,@RequestParam(value = "age") int age){

  User user = new User();
  user.setName(name);
  user.setAge(age);

  userDAO.save(user);

  return "add user success !";
 }

 @ApiOperation(value = "查找用户")
 @ApiImplicitParam(name = "id" , value = "id" , paramType = "query" , required = true , dataType = "int")
 @RequestMapping(value = "/findById" , method = RequestMethod.POST)
 public String findById(@RequestParam(value = "id") Long id){

  User user = userDAO.findById(id);

  if(user == null){
   return "error";
  }else{
   return "name:" + user.getName() + " , age:" + user.getAge();
  }
 }

 @ApiOperation(value = "查询所有用户")
 @RequestMapping(value = "/findAll" , method = RequestMethod.POST)
 public Iterable findAll(){

  Iterable<User> userList = userDAO.findAll();

  return userList;

 }

 @ApiOperation(value = "删除用户")
 @ApiImplicitParam(name = "id" , value = "id" , paramType = "query" , required = true , dataType = "int")
 @RequestMapping(value = "/deleteById" , method = RequestMethod.POST)
 public String deleteById(@RequestParam(value = "id") Long id){

  userDAO.delete(id);
  return "delete success !";

 }
}
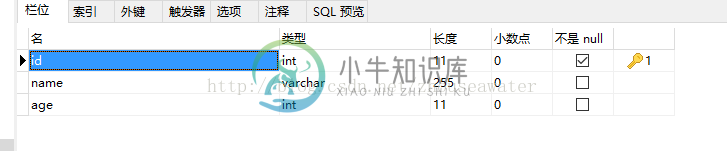
数据表(id定义为Integer):
UserDao:
package com.seawater.Dao;

import com.seawater.bean.User;
import org.springframework.data.repository.CrudRepository;

/**
 * Created by zhouhs on 2016/12/30.
 */
public interface UserDao extends CrudRepository<User, Long> {

 public User findById(Long id);

}
然后启动项目:访问http://localhost:8081/swagger-ui.html
结果:
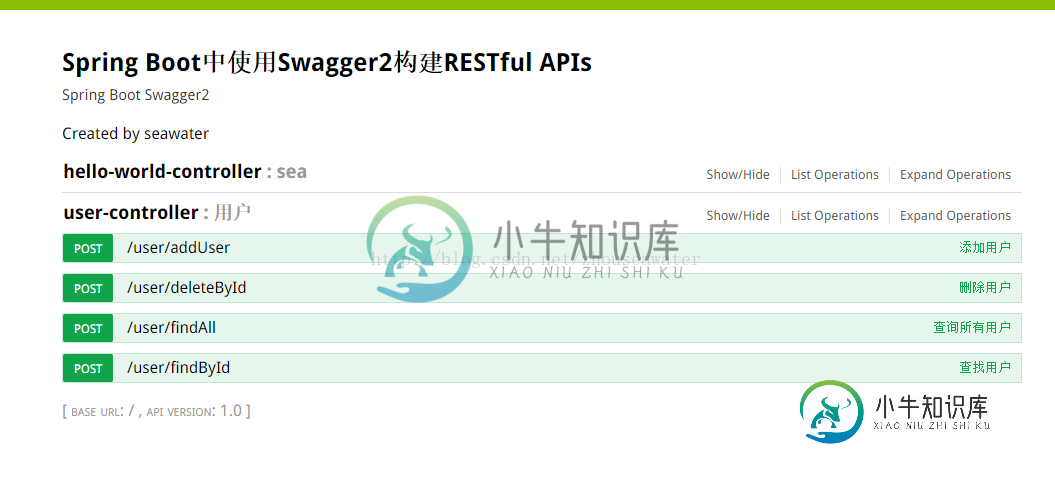
方法我就不一一操作了。
源码地址(项目中的源码可能会更多哦,需要自己找到对应源码):SpringBootLearning_jb51.rar
以上就是本文的全部内容,希望对大家的学习有所帮助,也希望大家多多支持小牛知识库。
-
我无法使此表单成功地将数据提交到数据库。我已经验证了数据库/表是否存在(模式如下所示),并且出于某种原因,它没有将其插入数据库。当我尝试提交示例数据时,它不会改变页面,只是坐在那里。发生了什么事? 模式: 食物(PID INT NOT NULL自动递增,主键(PID),名称VARCHAR(20),类型VARCHAR(9),NumCals INT,健康BOOL,注释文本)
-
我想用springboot项目生成MySQL数据库。我创建了一个maven项目,这是pom.xml:
-
我正在尝试从mysql数据库中检索今天的记录。 和控制器代码: 我希望通过使用findByDate(...)获得今天的记录方法,但似乎不起作用。在查看MysqlWorkbench的数据时,我还注意到一个小问题:日期似乎提前了2小时(例如:现在是11:57,但在mysql workbench软件中显示的是9:57,当我查询服务器时间时,显示的是不正确的tme……)我其实不关心小时/分钟/秒,我只想检
-
我需要一个概念来设计一个使用Spring boot、Hibernate和JPA的多数据库应用程序。 目前我正在考虑支持4个关系数据库(Mysql,H2,SQLLite,Oracle)。 我所做的是使用spring boot profile特性选择正确的数据库profile,然后加载相关的数据库属性。
-
当应用程序启动时,我正在尝试创建mysql数据库。我尝试了波纹管配置,但无法实现,如果有人对此有想法,请告诉我,
-
我试图在用户ID下添加新的用户数据,但它将旧数据替换为新数据,并添加另一个“users”和“user\u account\u settings”。 这是我的实时数据库:在此处输入图像描述 我的实时数据库必须是这样的:添加新的用户数据而不将旧数据替换为新数据,也不添加“用户”和“user_account_settings”。 这就是我想要的数据库结构示例:在此处输入图像描述 这是用于添加新用户的代码
-
MySQL 是一个使用广泛的数据库服务器,你肯定会在某些节点上安装配置 MySQL 服务器。 本节将向你展示如何安装配置 MySQL 服务器,以及如何为应用程序自动创建数据库和用户。 准备工作 如果你还没有 MySQL 模块,先创建一个: # mkdir /etc/puppet/modules/mysql # mkdir /etc/puppet/modules/manifests # mkdir
-
问题内容: 有没有一种方法可以使用预先定义的值自动更新Mysql DB中表中的列的值,并且该更新应该每月进行一次。 情况是,我想更新表雇员的列余额,每个雇员每月增加2.5天,并且每两年为每名雇员重设总天数。 问题答案: 考虑使用mysql的Create Event策略,该策略可以免去执行cron作业的麻烦。 几乎在任何情况下,您都可以做一些今年初就不会想到的事情。例如每周一次根据员工周年纪念日处理