vue、react等单页面项目应该这样子部署到服务器
最近好多伙伴说,我用vue做的项目本地是可以的,但部署到服务器遇到好多问题:资源找不到,直接访问index.html页面空白,刷新当前路由404。。。现在我们一起讨论下单页面如何部署到服务器?
由于前端路由缘故,单页面应用应该放到nginx或者apache、tomcat等web代理服务器中,千万不要直接访问index.html,同时要根据自己服务器的项目路径更改react或vue的路由地址。
如果说项目是直接跟在域名后面的,比如:http://www.sosout.com ,根路由就是 '/'。
如果说项目是直接跟在域名后面的一个子目录中的,比如:http://www.sosout.com/children ,根路由就是 '/children ',不能直接访问index.html。
以配置Nginx为例,配置过程大致如下:(假设:
1、项目文件目录: /mnt/html/spa(spa目录下的文件就是执行了npm run dist 后生成的dist目录下的文件)
2、访问域名:spa.sosout.com)
进入nginx.conf新增如下配置:
server {
  listen 80;
  server_name spa.sosout.com;
  root /mnt/html/spa;
  index index.html;
  location ~ ^/favicon\.ico$ {
    root /mnt/html/spa;
  }

  location / {
    try_files $uri $uri/ /index.html;
    proxy_set_header  Host       $host;
    proxy_set_header  X-Real-IP    $remote_addr;
    proxy_set_header  X-Forwarded-For $proxy_add_x_forwarded_for;
    proxy_set_header  X-Forwarded-Proto $scheme;
  }
  access_log /mnt/logs/nginx/access.log main;
}
注意事项:
1、配置域名的话,需要80端口,成功后,只要访问域名即可访问的项目
2、如果你使用了react-router的 browserHistory 模式或 vue-router的 history 模式,在nginx配置还需要重写路由:
server {
  listen 80;
  server_name spa.sosout.com;
  root /mnt/html/spa;
  index index.html;
  location ~ ^/favicon\.ico$ {
    root /mnt/html/spa;
  }

  location / {
    try_files $uri $uri/ @fallback;
    index index.html;
    proxy_set_header  Host       $host;
    proxy_set_header  X-Real-IP    $remote_addr;
    proxy_set_header  X-Forwarded-For $proxy_add_x_forwarded_for;
    proxy_set_header  X-Forwarded-Proto $scheme;
  }
  location @fallback {
    rewrite ^.*$ /index.html break;
  }
  access_log /mnt/logs/nginx/access.log main;
}
为什么要重写路由?因为我们的项目只有一个根入口,当输入类似/home的url时,如果找不到对应的页面,nginx会尝试加载index.html,这是通过react-router就能正确的匹配我们输入的/home路由,从而显示正确的home页面,如果browserHistory模式或history模式的项目没有配置上述内容,会出现404的情况。
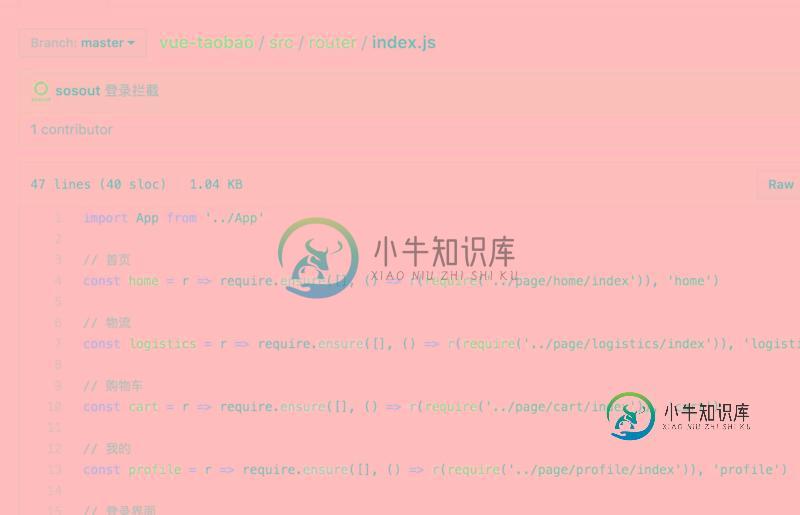
简单举两个例子,一个vue项目一个react项目:
vue项目:
域名:http://tb.sosout.com

import App from '../App'
// 首页
const home = r => require.ensure([], () => r(require('../page/home/index')), 'home')
// 物流
const logistics = r => require.ensure([], () => r(require('../page/logistics/index')), 'logistics')
// 购物车
const cart = r => require.ensure([], () => r(require('../page/cart/index')), 'cart')
// 我的
const profile = r => require.ensure([], () => r(require('../page/profile/index')), 'profile')
// 登录界面
const login = r => require.ensure([], () => r(require('../page/user/login')), 'login')
export default [{
 path: '/',
 component: App, // 顶层路由,对应index.html
 children: [{
  path: '/home', // 首页
  component: home
 }, {
  path: '/logistics', // 物流
  component: logistics,
  meta: {
   login: true
  }
 }, {
  path: '/cart', // 购物车
  component: cart,
  meta: {
   login: true
  }
 }, {
  path: '/profile', // 我的
  component: profile
 }, {
  path: '/login', // 登录界面
  component: login
 }, {
  path: '*',
  redirect: '/home'
 }]
}]

############
# 其他配置
############

http {
  ############
  # 其他配置
  ############
  server {
    listen 80;
    server_name tb.sosout.com;
    root /mnt/html/tb;
    index index.html;
    location ~ ^/favicon\.ico$ {
      root /mnt/html/tb;
    }

    location / {
      try_files $uri $uri/ @fallback;
      index index.html;
      proxy_set_header  Host       $host;
      proxy_set_header  X-Real-IP    $remote_addr;
      proxy_set_header  X-Forwarded-For $proxy_add_x_forwarded_for;
      proxy_set_header  X-Forwarded-Proto $scheme;
    }
    location @fallback {
      rewrite ^.*$ /index.html break;
    }
    access_log /mnt/logs/nginx/access.log main;
  }
  ############
  # 其他配置
  ############
}
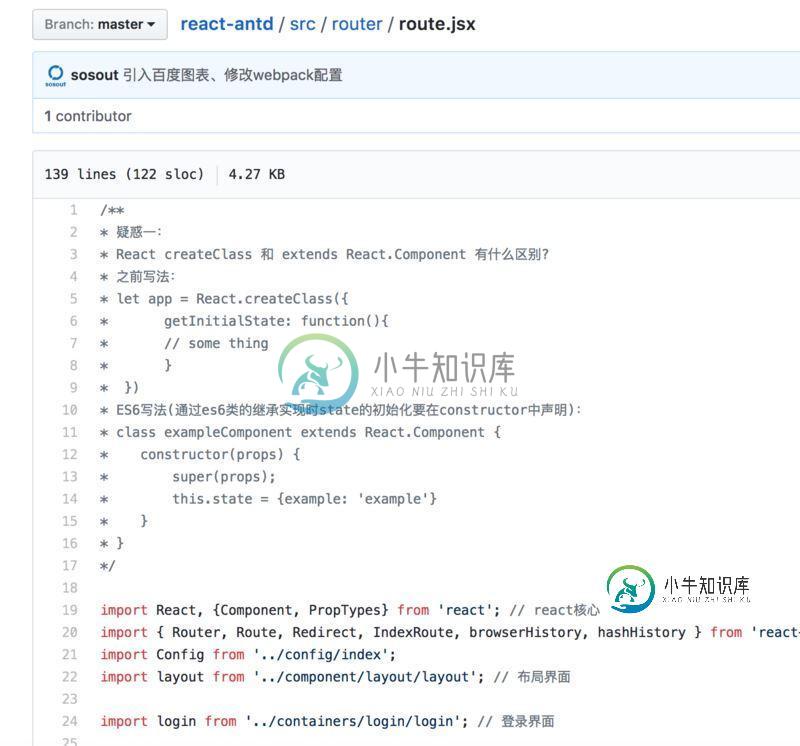
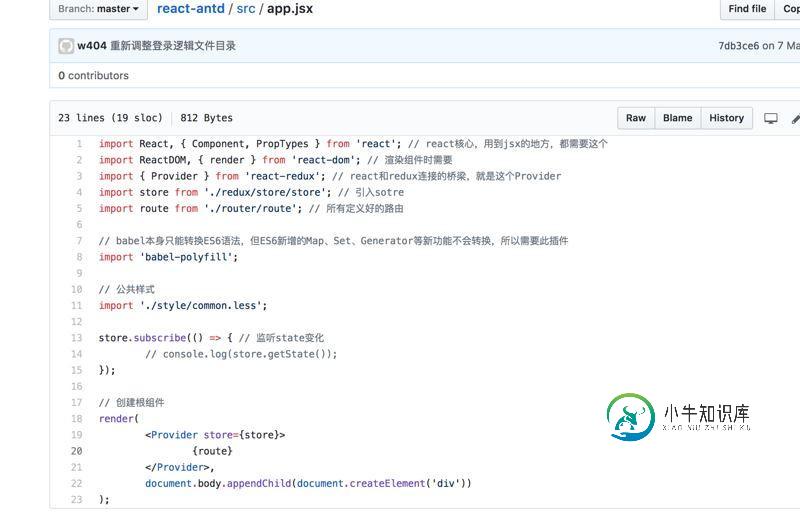
react项目:
域名:http://antd.sosout.com

/**
* 疑惑一:
* React createClass 和 extends React.Component 有什么区别?
* 之前写法:
* let app = React.createClass({
*   getInitialState: function(){
*    // some thing
*   }
* })
* ES6写法(通过es6类的继承实现时state的初始化要在constructor中声明):
* class exampleComponent extends React.Component {
*  constructor(props) {
*    super(props);
*    this.state = {example: 'example'}
*  }
* }
*/

import React, {Component, PropTypes} from 'react'; // react核心
import { Router, Route, Redirect, IndexRoute, browserHistory, hashHistory } from 'react-router'; // 创建route所需
import Config from '../config/index';
import layout from '../component/layout/layout'; // 布局界面

import login from '../containers/login/login'; // 登录界面

/**
 * (路由根目录组件,显示当前符合条件的组件)
 *
 * @class Roots
 * @extends {Component}
 */
class Roots extends Component {
  render() {
    // 这个组件是一个包裹组件,所有的路由跳转的页面都会以this.props.children的形式加载到本组件下
    return (
      <div>{this.props.children}</div>
    );
  }
}

// const history = process.env.NODE_ENV !== 'production' ? browserHistory : hashHistory;

// 快速入门
const home = (location, cb) => {
  require.ensure([], require => {
    cb(null, require('../containers/home/homeIndex').default)
  }, 'home');
}

// 百度图表-折线图
const chartLine = (location, cb) => {
  require.ensure([], require => {
    cb(null, require('../containers/charts/lines').default)
  }, 'chartLine');
}

// 基础组件-按钮
const button = (location, cb) => {
  require.ensure([], require => {
    cb(null, require('../containers/general/buttonIndex').default)
  }, 'button');
}

// 基础组件-图标
const icon = (location, cb) => {
  require.ensure([], require => {
    cb(null, require('../containers/general/iconIndex').default)
  }, 'icon');
}

// 用户管理
const user = (location, cb) => {
  require.ensure([], require => {
    cb(null, require('../containers/user/userIndex').default)
  }, 'user');
}

// 系统设置
const setting = (location, cb) => {
  require.ensure([], require => {
    cb(null, require('../containers/setting/settingIndex').default)
  }, 'setting');
}

// 广告管理
const adver = (location, cb) => {
  require.ensure([], require => {
    cb(null, require('../containers/adver/adverIndex').default)
  }, 'adver');
}

// 组件一
const oneui = (location, cb) => {
  require.ensure([], require => {
    cb(null, require('../containers/ui/oneIndex').default)
  }, 'oneui');
}

// 组件二
const twoui = (location, cb) => {
  require.ensure([], require => {
    cb(null, require('../containers/ui/twoIndex').default)
  }, 'twoui');
}

// 登录验证
const requireAuth = (nextState, replace) => {
  let token = (new Date()).getTime() - Config.localItem('USER_AUTHORIZATION');
  if(token > 7200000) { // 模拟Token保存2个小时
    replace({
      pathname: '/login',
      state: { nextPathname: nextState.location.pathname }
    });
  }
}

const RouteConfig = (
  <Router history={browserHistory}>
    <Route path="/home" component={layout} onEnter={requireAuth}>
      <IndexRoute getComponent={home} onEnter={requireAuth} /> // 默认加载的组件,比如访问www.test.com,会自动跳转到www.test.com/home
      <Route path="/home" getComponent={home} onEnter={requireAuth} />
      <Route path="/chart/line" getComponent={chartLine} onEnter={requireAuth} />
      <Route path="/general/button" getComponent={button} onEnter={requireAuth} />
      <Route path="/general/icon" getComponent={icon} onEnter={requireAuth} />
      <Route path="/user" getComponent={user} onEnter={requireAuth} />
      <Route path="/setting" getComponent={setting} onEnter={requireAuth} />
      <Route path="/adver" getComponent={adver} onEnter={requireAuth} />
      <Route path="/ui/oneui" getComponent={oneui} onEnter={requireAuth} />
      <Route path="/ui/twoui" getComponent={twoui} onEnter={requireAuth} />
    </Route>
    <Route path="/login" component={Roots}> // 所有的访问,都跳转到Roots
      <IndexRoute component={login} /> // 默认加载的组件,比如访问www.test.com,会自动跳转到www.test.com/home
    </Route>
    <Redirect from="*" to="/home" />
  </Router>
);

export default RouteConfig;

############
# 其他配置
############

http {
  ############
  # 其他配置
  ############
  server {
    listen 80;
    server_name antd.sosout.com;
    root /mnt/html/reactAntd;
    index index.html;
    location ~ ^/favicon\.ico$ {
      root /mnt/html/reactAntd;
    }

    location / {
      try_files $uri $uri/ @router;
      index index.html;
      proxy_set_header  Host       $host;
      proxy_set_header  X-Real-IP    $remote_addr;
      proxy_set_header  X-Forwarded-For $proxy_add_x_forwarded_for;
      proxy_set_header  X-Forwarded-Proto $scheme;
    }
    location @router {
      rewrite ^.*$ /index.html break;
    }
    access_log /mnt/logs/nginx/access.log main;
  }

  ############
  # 其他配置
  ############
}
以上就是本文的全部内容,希望对大家的学习有所帮助,也希望大家多多支持小牛知识库。
-
本文向大家介绍vue、react等单页面项目部署到服务器的方法及vue和react的区别,包括了vue、react等单页面项目部署到服务器的方法及vue和react的区别的使用技巧和注意事项,需要的朋友参考一下 最近好多伙伴说,我用vue做的项目本地是可以的,但部署到服务器遇到好多问题:资源找不到,直接访问index.html页面空白,刷新当前路由404。。。用react做的项目也同样遇到类似问题
-
本文向大家介绍vue项目部署到nginx/tomcat服务器的实现,包括了vue项目部署到nginx/tomcat服务器的实现的使用技巧和注意事项,需要的朋友参考一下 开发完的vue项目,需要部署到Nginx/Tomcat服务器上运行,作为一个前端小白,刚接触vue不久,研究了一番,于是写下这篇文章,记录下来便于今后部署。 1.router(history)模式vue项目部署到nginx 1)修改
-
本文向大家介绍Vue-cli项目部署到Nginx服务器的方法,包括了Vue-cli项目部署到Nginx服务器的方法的使用技巧和注意事项,需要的朋友参考一下 0. Nginx使用 以windows版为例,下载niginx压缩包并解压到任意目录,双击nginx.exe,在浏览器中访问http://localhost,如果出现Welcome to nginx!页面则说明成功。 nginx常用命令如下:
-
我的网站有两个服务器——本地(ubuntu桌面上的laravel homestead)和公共(带有php7的ubuntu服务器)。我已经有了一些简单的网站,它们在我的公共服务器上运行良好,并且可以在网上看到。我在我的laravel Homestead本地服务器上创建了laravel 5.2项目,现在我想将其移动到我的公共服务器上。我压缩完整的项目文件夹(tar.gz),并使用filezilla将其
-
我在Laravel voyager上做了一个测试项目。我想把它发布到服务器上。 我试试这个: 初始化 git远程添加原点 *** git检出大师 git拉 添加. env 添加. htaccess php工匠迁移--force 在ProviderRepository.php第208行中:未找到类“TCG\Voyager\VoyagerServiceProvider” 怎么做? 更新: php ar
-
我在科尔达做了一个简单的项目。我的项目有4个节点,包括公证人和客户文件夹中的SpringBoot API。我不知道如何将我的项目部署到服务器上。我看过Corda文档,但那篇教程只针对一个节点。所以,我的问题是如何在服务器上部署具有多个节点的Corda项目,以及SpringBoot API。有人能帮我吗?
-
本文向大家介绍Vue 项目部署到服务器的问题解决方法,包括了Vue 项目部署到服务器的问题解决方法的使用技巧和注意事项,需要的朋友参考一下 相信很多小伙伴在用Vue-cli安装的脚手架开发的时候,在开发环境中项目可以很正常的运行,但是进入到生产环境,编译打包后,放入服务器,项目就不正常了,会出现空白页或者路由跳转404等问题。遇到这些问题不要慌张,正确的配置加上后端的简单配合就可以解决。 如何打包
-
本文向大家介绍vue项目部署到Apache服务器中遇到的问题解决,包括了vue项目部署到Apache服务器中遇到的问题解决的使用技巧和注意事项,需要的朋友参考一下 最近刚重构完,我们的一个项目,由原来的jsp模式改为了前后端分离,前端选型为vue,开发完成之后第一件时间就是要部署测试,服务端选的是Apache。本来以为很简单的一件事情,几经坎坷部署了两天才算能够正常访问了。先记录如下, 过程搭建A

